This is my opinion about this platform.
A few weeks ago, Platform9 announced a Hands-on-Lab for their KubeVirt implementation, and after using Harvester for running VMs mainly for deploying Rancher RKE clusters, I got my hands on this platform and the differences are huge.
First, Platform9 keeps its offering very close to the upstream project, what does this mean, it looks like you installed KubeVirt manually in your K8s cluster, this is good. The good thing about it is that you are more familiar with the solution and when the time to move to another KubeVirt offering comes, the changes will be minimal.
As you may know, Kubernetes goes first. PMK (Platform9 Managed Kubernetes) needs to be installed.
https://platform9.com/docs/kubernetes/get-started-bare-metal
pf9ctl is the tool used to create a K8s cluster managed from PMK. In the previous link, you can see how easy is to create a cluster with just one Master node (for testing of course!) and one Worker, this was the scenario of the Hands-on-Labs.
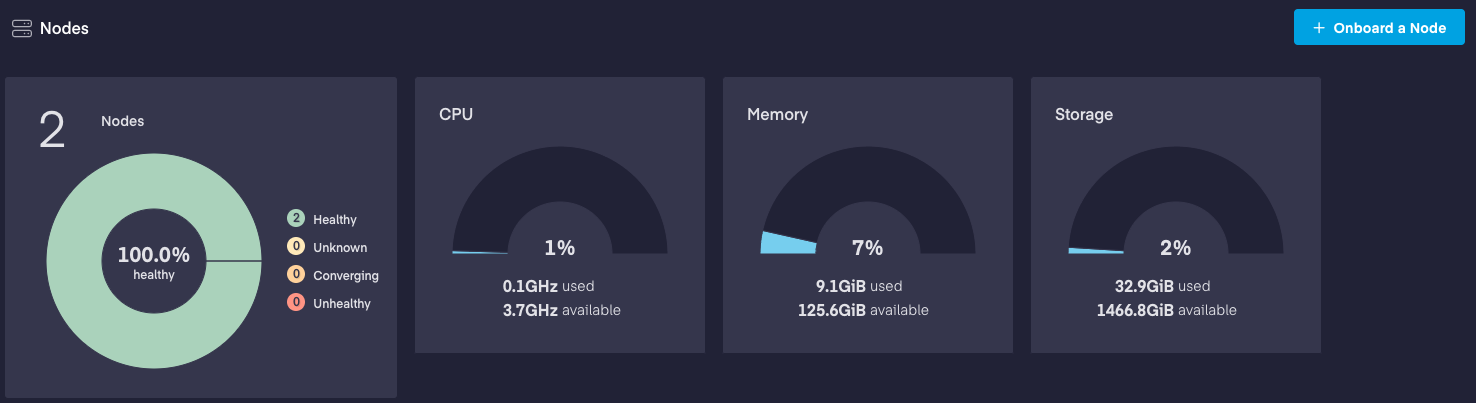
The pre-node option for pf9ctl will install an agent and begin promoting the server to a PMK node that can be used to build a cluster. This progress can be monitored in the infrastructure -> Nodes section of the platform.
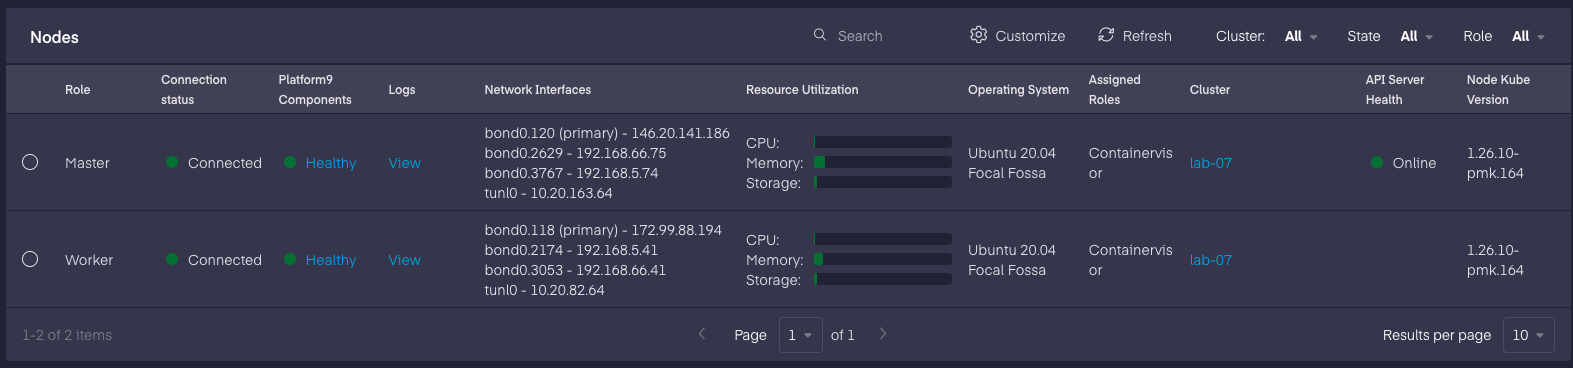
These two nodes are already assigned to a cluster, there you can see the Role assigned to each of them.
With a K8s cluster already running, is time to add KubeVirt. Platform9 provides this as an add-on, with just one click it can be installed!
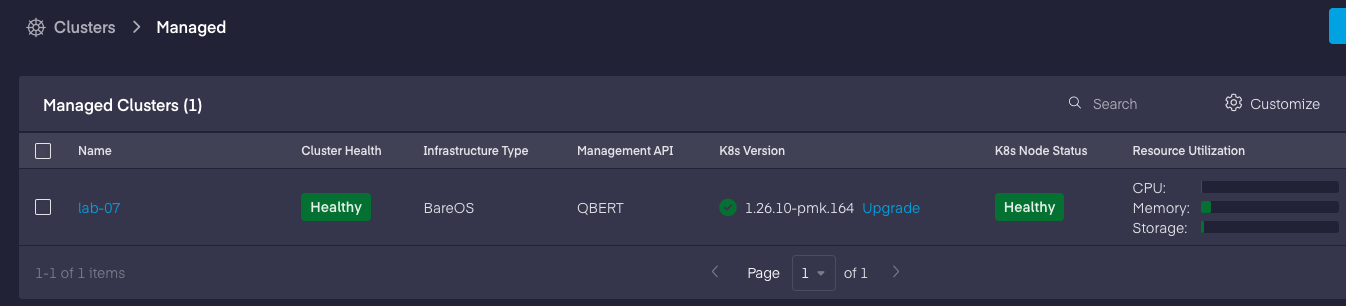
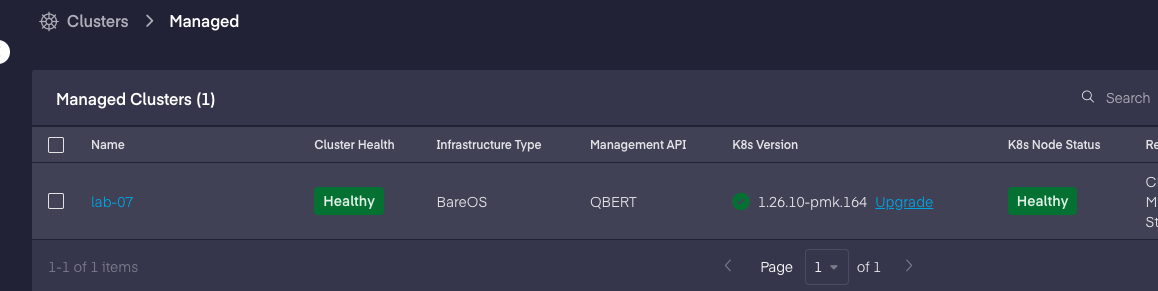
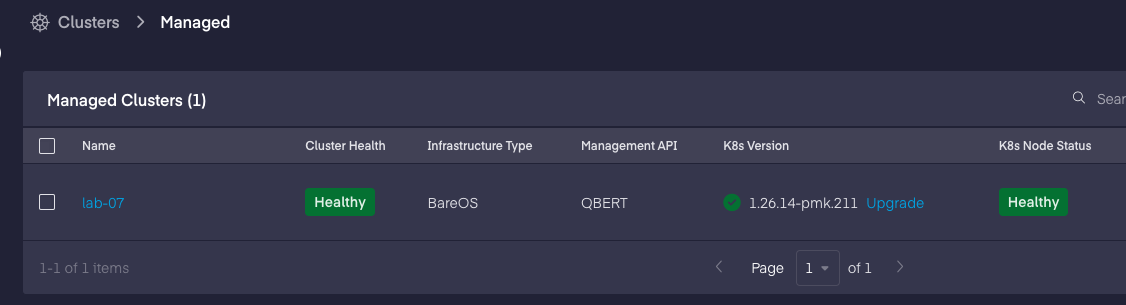
From Infrastructure -> Clusters -> Managed, a list of managed clusters will appear, there we select the one intended for KubeVirt.

There are some similarities with the Node section from Infrastructure. Here the information is about Kubernetes, Let’s click Add-ons and search for KubeVirt. In this cluster, the add-on is already active. But as I said, is just one click away.
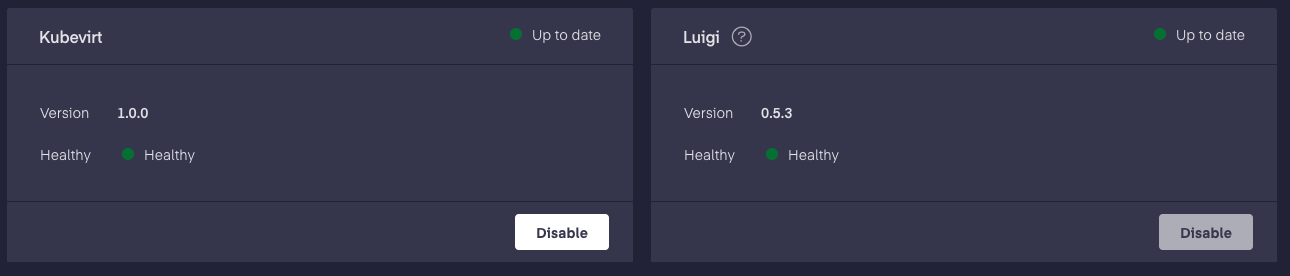
In the Platform9 KubeVirt documentation, the detail of the steps are for a cluster with a KubeVirt add-on added at build time, this is the fastest way to do it for a new cluster, in the case that the cluster already exists, the add-on can be added without issues. One dependency for KubeVirt is Luigi, which is a network plugin operator.
KubeVirt section.
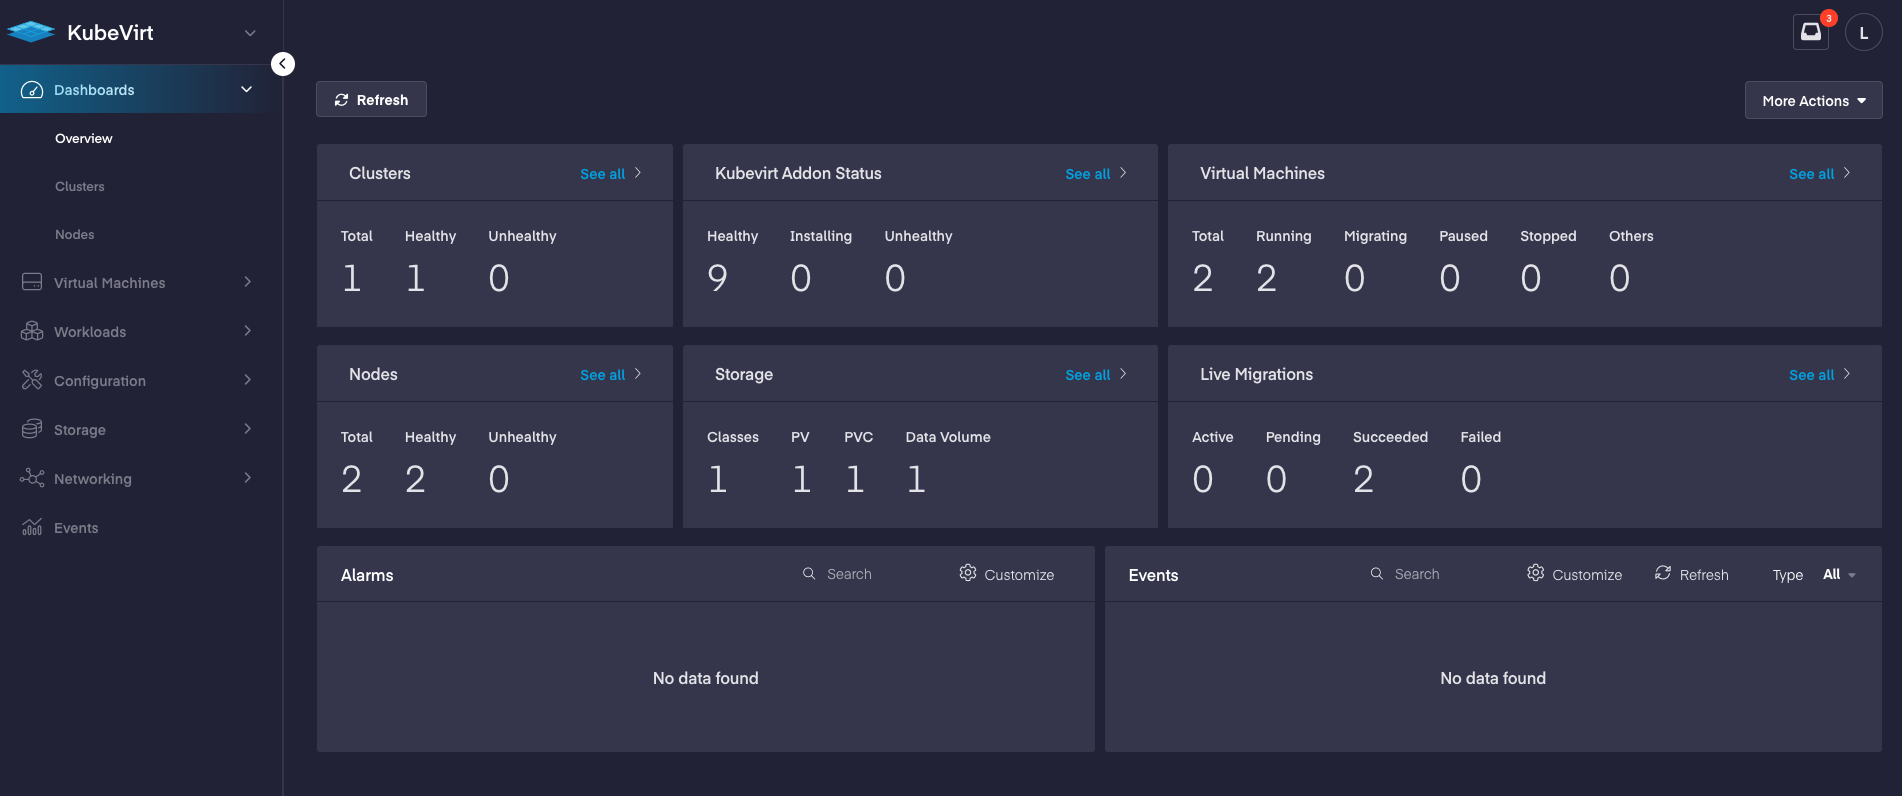
A lot of information. Virtual Machines section, you can easily see the total, running or the VMs being migrated.
Virtual Machine creation.
Still, in the KubeVirt section of the platform, we need to go to Virtual Machines, there we have three areas of interest. All VMs, Live Migrations, and Instance Types.
In All VMs, is where all the created VMs will appear. In the top right, we have Add Virtual Machine.
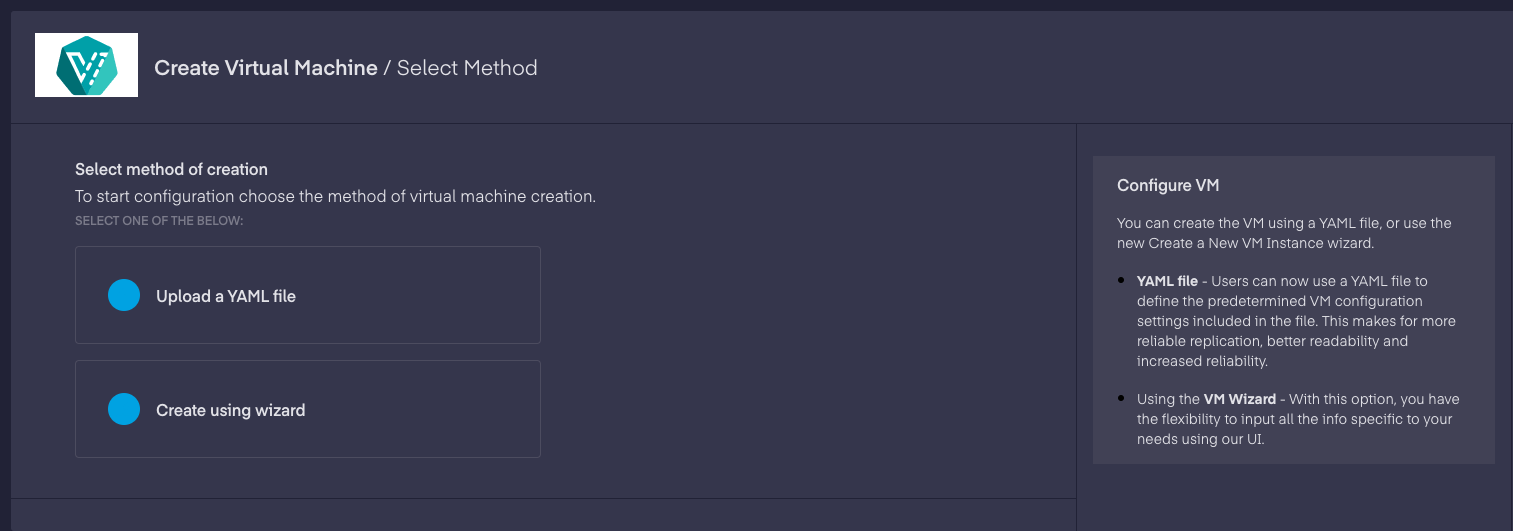
Clicking the Create using wizard will bring this page:
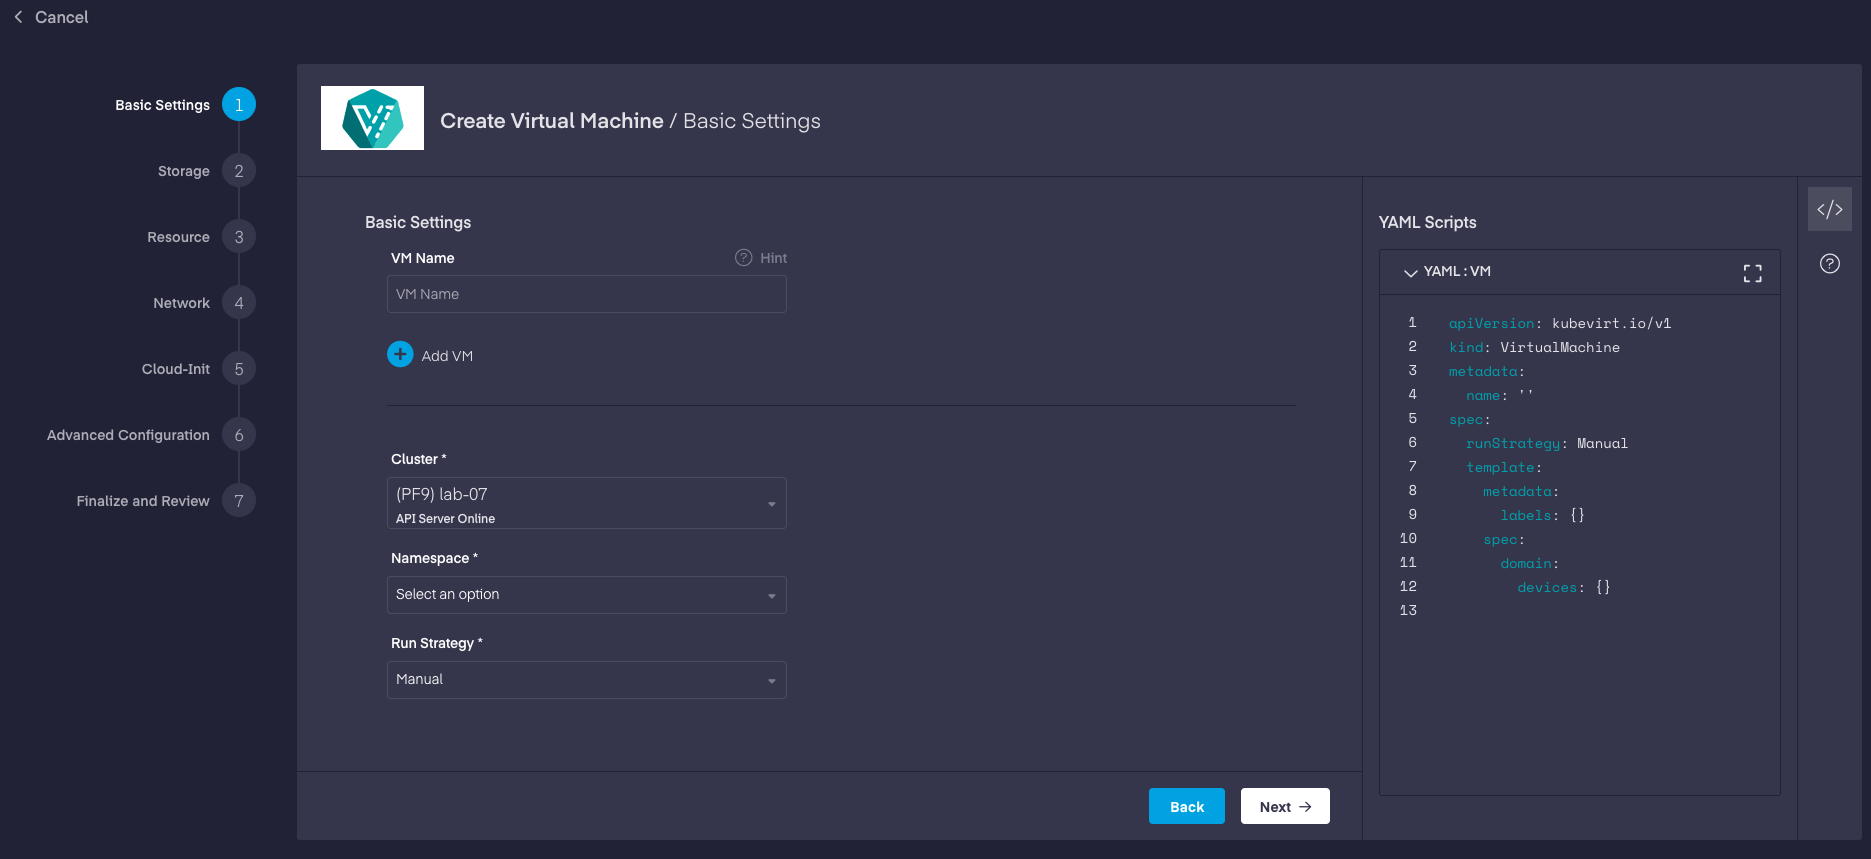
The best part is that while we select the desired options for our VM, the right side of the wizard with the YAML syntax will start updating itself!
That’s a great feature, this way we can start learning how to do the YAML version of the VM creation process and maybe run some CI/CD and automagically get VMs.
What can we do with VMs on this implementation of KubeVirt?
From the Virtual Machines -> All VMs section, the list of available VMs will appear, there we can manage those VMs.
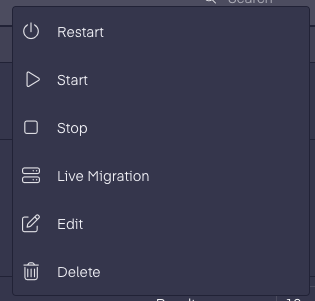
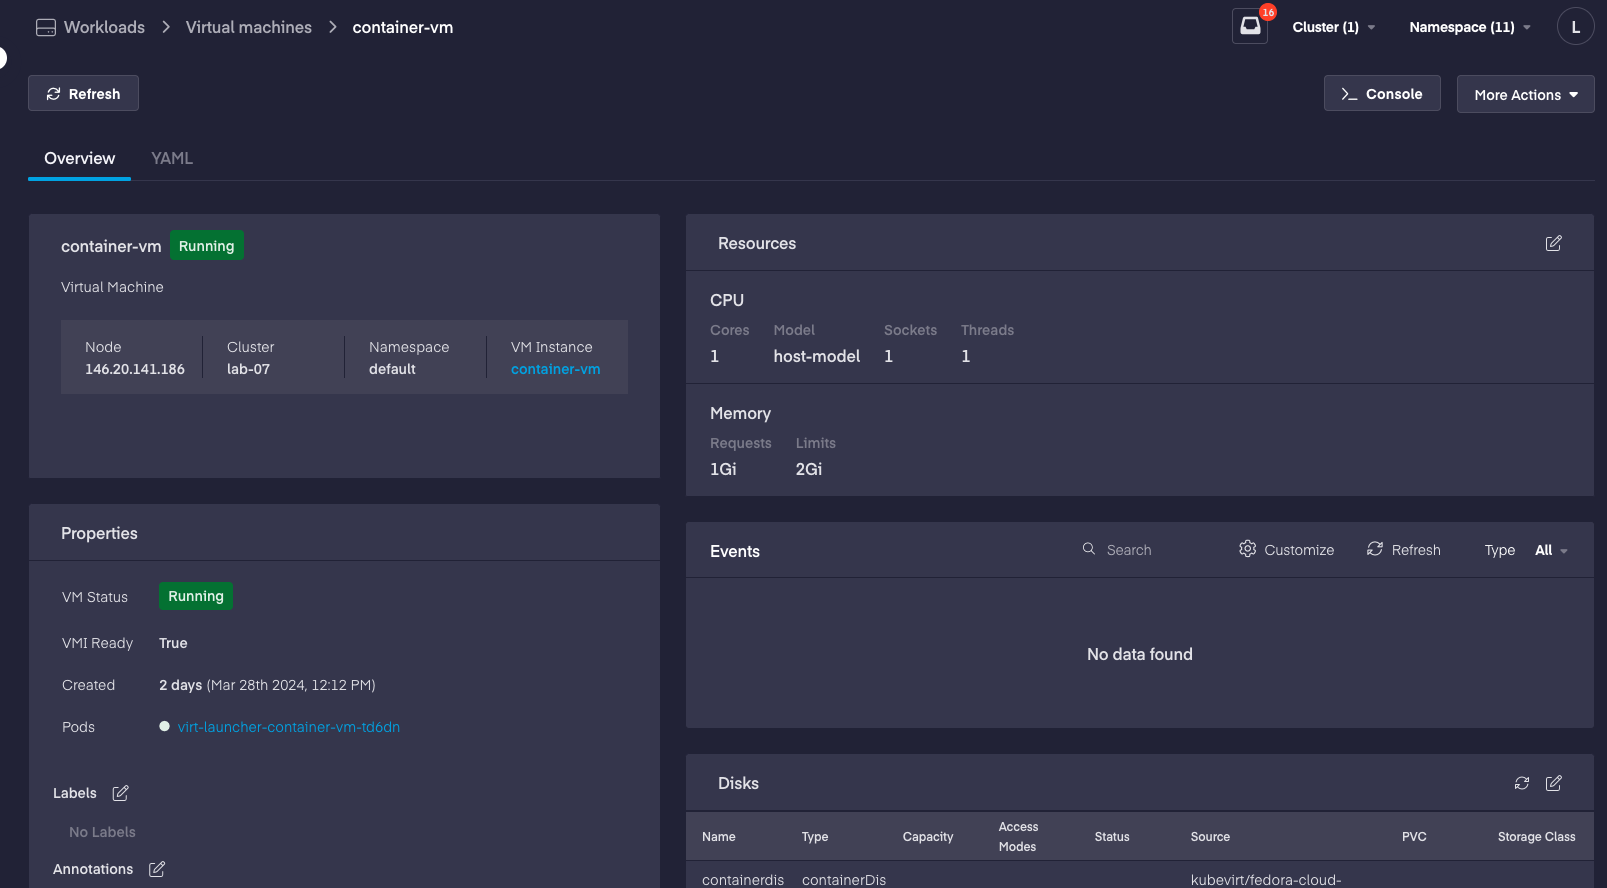
Selecting a VM gives us more information and a lot of other parameters to modify, like disk size, memory size, and networking.
There is a lot more to talk about, I’m planning to keep getting into Platform9 KubeVirt solution and do a comparison to Harvester!
While creating our cluster, we selected an older version of Kubernetes, the idea is to be able to run an upgrade and see how things are handled for our VMs.
In Infrastructure -> Clusters -> Managed we can select the cluster that will be upgraded, in my case there is only one.
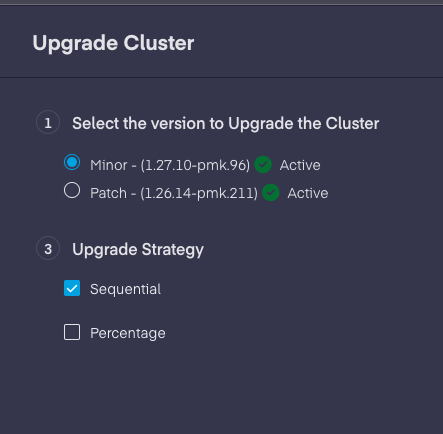
Here I selected Patch and clicked Upgrade Now.
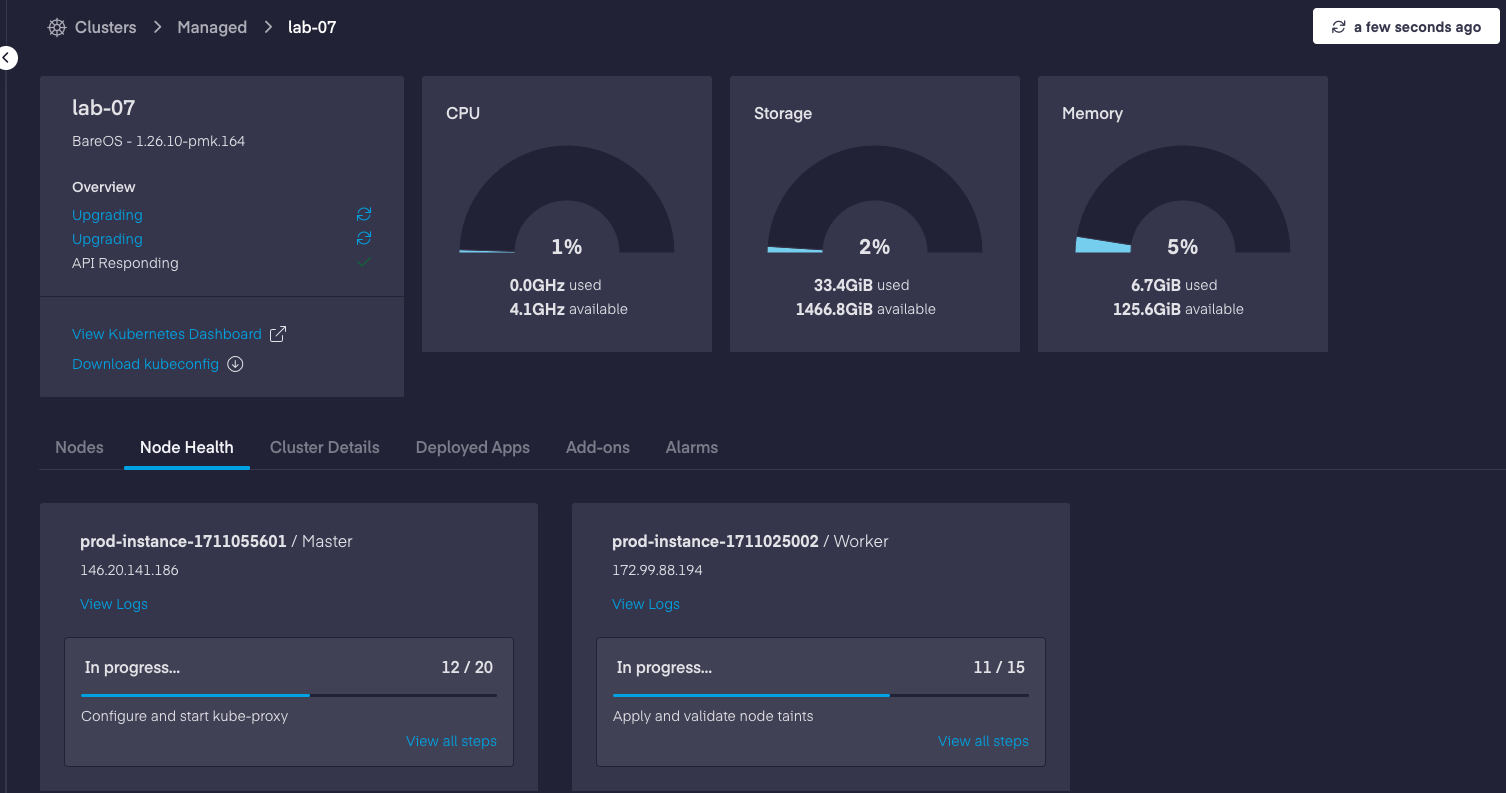
The steps for the upgrade are very similar to the initial install.
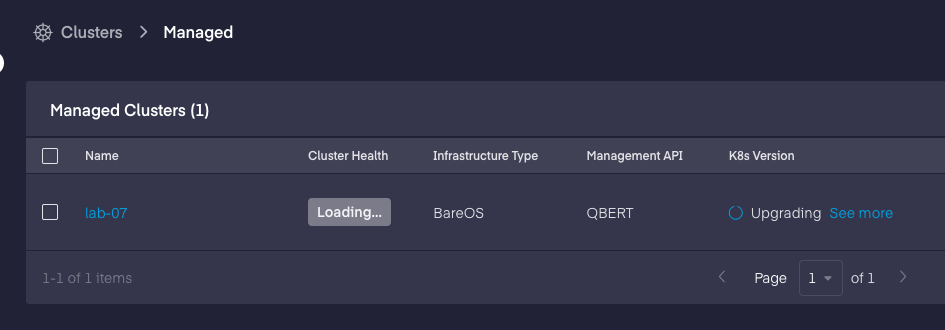
While upgrading I noticed that the VMs first were moved to the Worker node, this is expected, the first nodes to upgrade on K8s are the Master nodes.
Now we are at 1.26.14-pmk.
Of course, a cluster with just one Master and one Worker is not a production-ready cluster, and doing an upgrade to that will cause connectivity loss and other issues.
Next, I will try to get my hands on PMK access to try to build a cluster in my homelab, here I will be testing more stuff related to Storage and Networking, MetalLB being the more interesting one!
Just like the OpenStack HoL version, there will be some videos on YouTube, stay tuned!
Deja una respuesta